ویدئو شماره 152
7 فروردین 1402 1402-08-24 18:22ویدئو شماره 152
Place artwork on piece

Note!This function requiresAutomArt 2Design license.
In the version without an AutomArt 2Design license, the resources can be placed on the pieces, you being able to change the artwork properties.
When the model is opened on the dongle where it was created, and the license for AutomArt 2Design is activated, the artwork remains placed on the pieces, as previously done.
If the model is opened on a dongle without an AutomArt 2Design license, the artworks are deleted from the pieces, but are kept on Artwork resource manager.
The models with artworks created on Fashion STUDIO without an AutomArt 2Design license can be imported in Nest EXPERT, and the marker can be created, but the PDF export is disabled.
To add an artwork onto a pattern, enter Garment Mode,select the Place artwork on piece function from the specific toolbar, then follow the steps in the Activity Zone. Once the Validate button or the ENTER key are accessed, the artwork is added onto the pattern. The position where it is placed on the pattern is indicated by the position anchor of the artwork.
To select an artwork that is already added on the pattern, access Garment Mode, select the pattern, and, then, the position anchor of the artwork; or, in the Activity Zone / Context Options / Artwork Zone, select the name of the artwork.
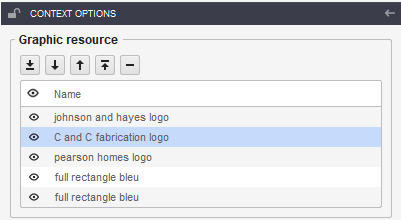
Once an artwork is selected, its bounding box is visible on the canvas, and, in Context Options from Activity Zone, the following options and properties will be available:
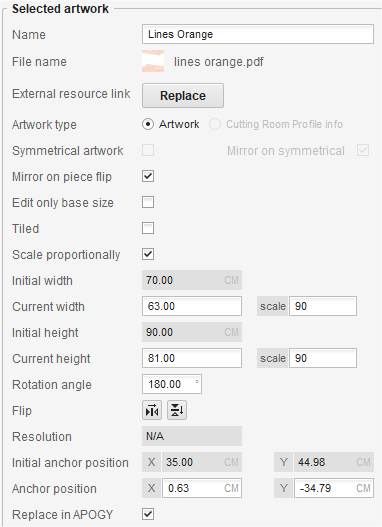
Selected artwork properties:
- Name – the name of the artwork will be displayed. Clicking on the edit field will allow for the name to be changed;
- File name – displays the name of the artwork file which was loaded in the Digital decoration window
- External Resource link – By clicking on the Replace button, you will be able to select another resource that must replace the selected resource. The imported graphical resource is loaded with the properties that are assigned to the current graphical resource. When replacing the graphical resource, the bounding box dimension of the imported graphical resource is maintained. The replacement of a graphical resource is made in all the applications, regardless of its location: imported in the model or with a link to a specific disk location.
- Artwork type – There are two graphical resource types: Artwork and Cutting Room Profile info.
- The Artwork resource type is set for all the graphical resources that represent the graphic design of the model.
- The Cutting Room Profile info type is set for those resources that display information about the product manufacturing, information that is taken from the Gemini Cloud platform.
- Symmetrical artwork – this option is available for pieces with a declared symmetry axis. If checked, the resource will be symmetrized relative to the piece’s symmetry axis.
The graphical resource assigned to a symmetrical piece has a new property: Mirror on symmetrical.
When Mirror on symmetrical is checked, the graphical resource is flipped horizontally on the symmetrized half.
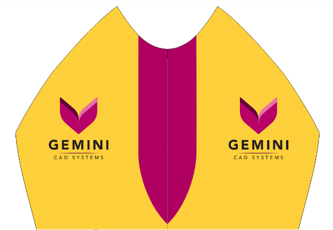
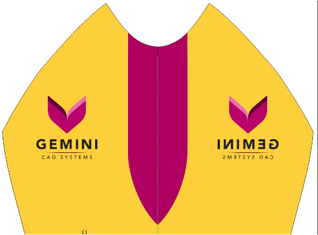
The Gemini logo from the symmetrized half is flipped horizontally.
- Mirror on piece flip – the artwork will be mirrored when the piece is flipped
Note!This symmetrical property is valid for as long as the piece has a symmetry axis. The property is not applicable when extracting the piece with a symmetry axis into a new symmetrical piece.
- Edit only base size – if checked, the properties of the artwork are changed only on the base size;
- Tiled – if checked, the artwork will be multiplied vertically and horizontally until the entire surface of the piece is covered.
- Scale proportional – if checked, any change made to the width or height will determine a proportional change of the value for the height or width;
- Initial width – displays the original width of the artwork;
- Current width – displays the modified width of the artwork;
- Initial height – displays the original height of the artwork;
- Current height – displays the modified height of the artwork;
- Rotation – the angle to rotate the artwork. The anchor position is the rotation center.
- Flip – the artwork can be flipped horizontally and/or vertically;
- Initial anchor position – the values on X and on Y are displayed, relative to the origin of the piece;
- Anchor position – the anchor position can be changed by X/Y coordinates from the origin point;
- Replace in Gemini Cloud – if checked, the artwork can be replaced on the Gemini Cloud platform. Checking the option for a piece’s artwork will be applied on all the patterns from the model where it was used. If this option is not checked, the artwork will be not displayed in Gemini Cloud.
Note! the position of the artwork can be changed freely as well, by dragging the position anchor or by using the keyboard arrows.
To move the artwork(s) only when the contour or anchor point is selected, during the selection stage, press the M key.
- Reposition anchor – the anchor will be repositioned without rescaling of the artwork. The anchor will be repositioned according to the following options:
- Maintain anchor position: reposition the artwork so that the positioning anchor has the same coordinates, relative to the origin point of the piece;
- Maintain artwork position: recalculates the position of the anchor so that the artwork does not change position on the piece.
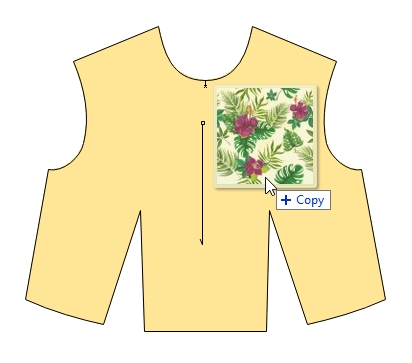
The artworks can be placed on the pieces also by selecting the file from the disk and pulling it over a piece from the application. While pulling a file into the application, the validity of its placing will be marked as follows:
- if the file is valid, being loadable (.pdf- or .svg–type files), when brought over a piece, next to the cursor, the + Copy symbol will be displayed;
- if the file is not valid, irrespective of the area from the application where it is brought, next to the cursor, the Rejected symbol will be displayed.
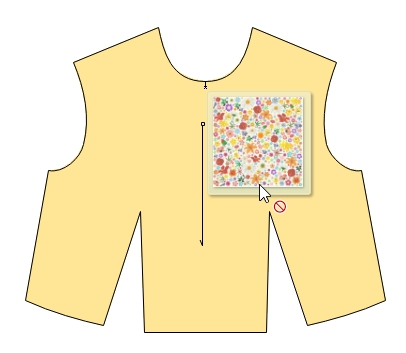
Note! The resources brought into the model in this manner will be imported by maintaining the link with the external resource.
Note! More info about Place artwork on piece can be found in subchapter AutomArt2Design, in Add-ons.
بسته برنزی
-
شامل 79 ویدئو از فصل اول تا سوم
-
پشتیبانی از طریق چت آنلاین
-
بدون کتاب
بسته نقرهای
-
شامل 153 ویدئو فصل اول تا ششم
-
پشتیبانی از طریق چت آنلاین
-
بدون کتاب
بسته طلایی
-
شامل 212 ویدئو کتاب
-
پشتیبانی از طریق چت آنلاین
-
بدون کتاب
کتاب
-
قطع رحلی 302 صفحه رنگی با کیفیت عالی
-
پشتیبانی از طریق چت آنلاین
-
بدون بسته آموزش تصویری


