The function is used to create flares and gathers.
This function allows you to slash and spread a pattern through the lateral moving of a declared segment’s sides by selecting two points (a fixed and a mobile point) from the piece contour.
To carry out the bulging, follow these steps:
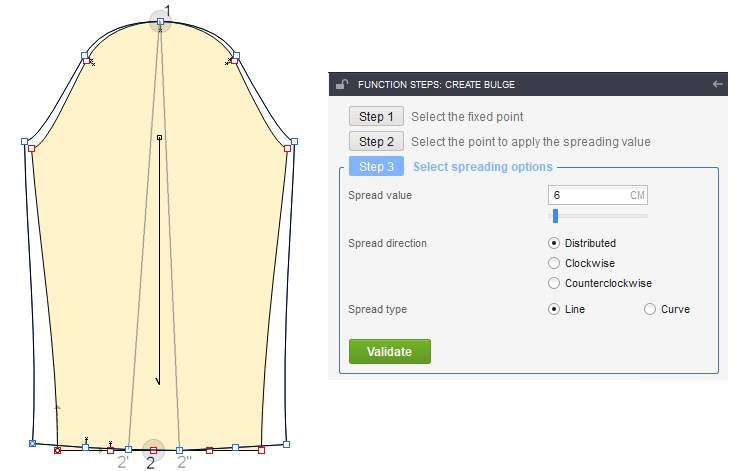
Step 1: select the fixed point;
Step 2: select the point to assign a bulging value to;
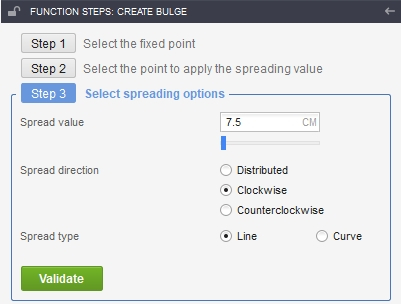
Step 3: select the bulge options:
Spread value – set the value here by entering it into the field next to this tag, or by moving the slider;
Spread direction – the bulge value assigning manner; this value can be evenly distributed in a clockwise and anticlockwise direction, only in a clockwise direction or only in anticlockwise direction relative to the mobile point (the point selected in Step 2);
Spread type: the section type of the contour area freshly resulted through bulging; it can belong to one of these types: line or curve.
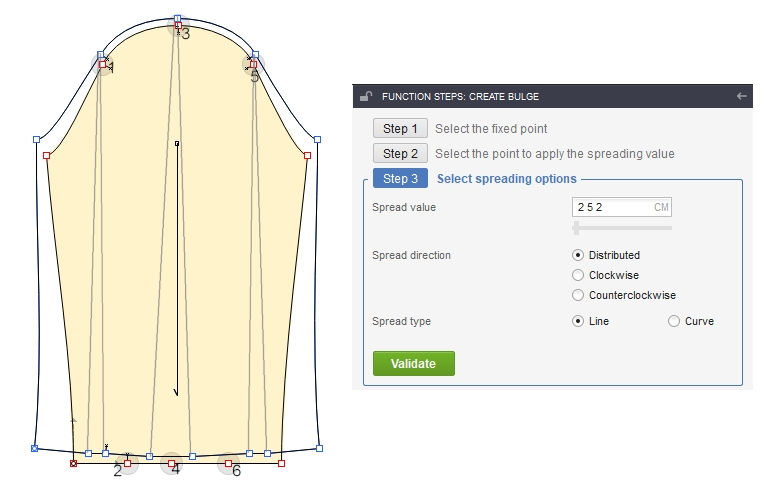
The bulging function involves changing the piece’s geometry, the modification being noticeable as early as in Step 3, in the preview state. To keep the defined bulging up to this step, validate the function by clicking on Validate. As for bulging a pattern in more areas, this function allows you to select more bulging segments. Declare a sequence of bulging segments by selecting the fixed point and, then, the mobile point of each segment; then, click on the Next button to go further, to Step 3. As for this case of declaring the bulging, the bulging values can be identical for all segments, or they can be different. To apply different bulging values, enter these values into the Spread value field, separated by space. If the same value is applied in all mobile points, a single value must be entered into the field.
Note!The number of values entered in the field needs to correspond to the number of segments declared. The bulging values entered must be applied in the order in which the selection of the bulging segments was made.