ویدئو شماره 43

Blueprint

Note! This function is an add-on that is limited to 1 page in Community and Freelance versions and 5 pages for Atelier version. More info about Blueprint can be found in subchapter Tech Pack in Add-ons.
In these versions, you can work with a blueprint in A3 or A4 format and can be exported or printed only one page, respectively 5 pages.
When opening a model in which the Blueprint has more than one page and the page format is different from A4, a pop-up will appear with the following message: You do not have a license for Tech Pack / Blueprint. If you open this model, all the page settings will be reset and only one A4 page will be displayed.; the piece position from the native model will be kept in Blueprint.

The patterns’ shape, according to which the cutting is made, is only one of the issues a designer needs to tackle. The results of the CAD department’s activity need to cover additional information, such as: a production guide for the sewing, accessories, labels, embroideries, printed patterns and other decorative elements. The information is transferred to other departments through technical sheets, which contain sketches, drawings, images and text with instructions.
The creation of a blueprint which should include all the information mentioned above is operated via the Blueprint function. The latter allows you to customize the blueprint’s format.
After clicking on Blueprint, a multi-area window opens:

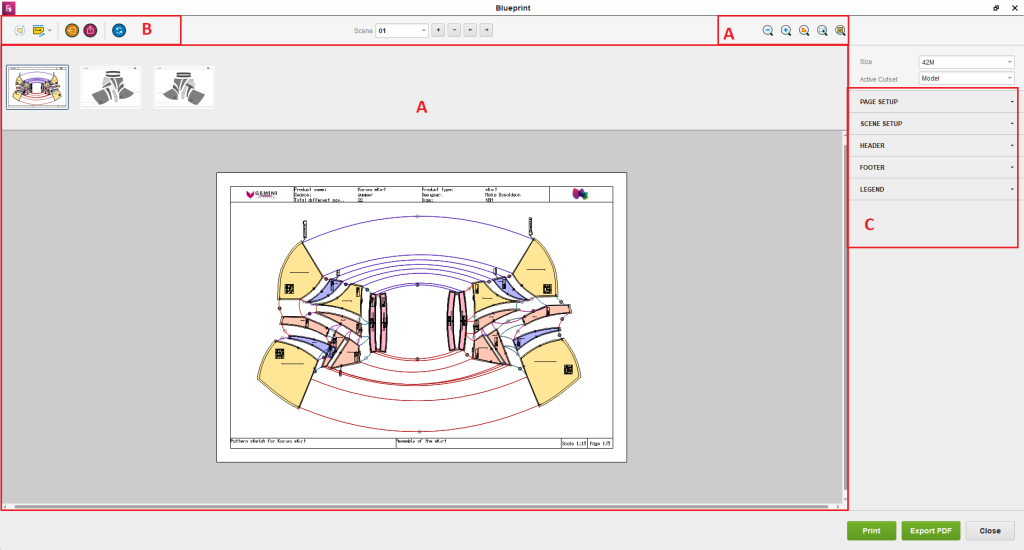
Scene’s preview area and preview options (A)
The assembly plan is structured into working scenes, one piece/ piece group being displayable into more scenes.
The scenes can be selected for previewing by clicking on the image of the scene displayed in the upper area. If you wish to rearrange the scenes in the assembly plan, you need to select the scene to be moved, and further click on the Move left Move right buttons.
In a scene’s preview area are displayed the pieces from the model and the information that is, eventually, printed on the page.
In this area, with a direct click on the pieces, they can be selected, moved or deleted.

Note! To delete the pieces from a scene, you need to select them, and click on the Deletebutton from the keyboard. To bring the pieces into the scene, click on the main window’s Redobutton.
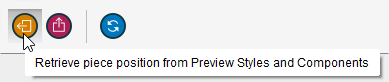
The assemblies declared on the patterns when Previewing styles and components’ content can be deleted from certain scenes, this action being necessary when you wish to display on the page only certain patterns from the whole model. To delete the assemblies, first, select them, and, then, press the Delete key.

The zooming options are the ones from the working area.

Use the Size filter to select what size to preview in a scene, and use the Components filter to choose a model, a style or a component that you want to be displayed in the scene.

Functions for modifying the pieces position and orientation (B)

 
Rotate
You can rotate the pieces from the preview area using the Rotate function. you need to select the piece before accessing this function. When the function is accessed, with a piece or with a group of pieces selected, at the center of these pieces border is displayed the rotation center in relation to which the rotation is carried out. The rotation center can be moved.
Align by grain axis horizontally
The functionality is the one from the main window.
Retrieve piece position from Preview Styles and Components
Use this function when wanting to bring the position of the pieces from the Preview Styles and Components window into the Blueprint window.
Retrieve piece position from Canvas
Use this function when wanting to bring the position of the pieces from the Canvas (working area of Fashion STUDIO) into the Blueprint window.
Refresh

Use this function when you want to update all the pieces from all the scenes with all the modifications made in the working area (contour reshaping, adding removing technical elements, etc). ​

Setting the page and the corresponding information from it (C)
The settings that can be made to the page are as follows:

  • the page format;
  • the Page orientation – Landscape or Portrait.

The settings that can be made to the scene are 

  • the Scale for the pieces’ displaying on the page;
  • the size of the Horizontal margins;
  • the size of the Vertical margins;
  • the Scaling of the texts from the page;
  • the Art elements’ size.
  • Send piece position from this scene to Web3DCustomize 
 

The page’s header is divided into three zones: the first one displays Gemini CAD Systems’ logo (the logo format is set depending on the page type opted for: Portrait or Landscape), the second one displays information from the technical sheet and regarding the model, while the third one can display the company’s logo.
The settings that can be made for the Header are:

  • the number of columns where the header information is organized;
  • the option to display the header on all the pages or on the first page only;
  • the information displayed in the header – the hiding or the showing of the information in the header is carried out through selecting the information and clicking on the symbol in front of it.

The information can be reorganized by moving it upwards or downwards in the list using the Move up/Move down buttons.

  • Image – allows displaying the company’s logo in the blueprint. The Import artworks function allows you to load the logo.
  • Image height – can be defined by the header’s height, or you can set it; however, the image’s height cannot exceed the header’s.

The page footer is divided into two zones where text-type information or images can be fed in. On the right side is displayed the page number.
The Footer settings are:

  • Show footer – the footer can be displayed in the blueprint or not.
 

The footer can be displayed on all the pages or on the first page only.

 
  • Left columnRight column– here text-type information or images can be entered. Images can be loaded in the model through the Load artworks function from Garment. By clicking on Validate, this information is displayed in the blueprint.
  • Image height – is the height of the image displayed; it can be defined by the footer’s height or you can set it. This property is applied in both columns.
 

If there are decorative stitches in the model, they can be presented in the Legend.


The Legend settings are:

  • Show legend – the legend can be displayed in the blueprint or not. The Show legend option is not active if there are no decorative stitches in the model.
    • the legend can be displayed on all the pages, on the first page only or on the last page only.
    • the Information displayed in the legend regards the decorative stitches from the model. The latter can be described through their being selected on the list, and subsequently entering the corresponding description.
      Similarly, to the Header information, the Legend information can be reorganized inside the list, or can be hidden.
    • the width of the legend’s border can be modified, its height depending on the number of decorative stitches from the model.
    • the legend’s Position on a page can be modified through the X/Y coordinates.
 

Apply the scene, header, footer and legend settings individually, for each of the scenes from the assembly plan.
The blueprint can be printed by clicking on Print; it can also be exported as a *.pdf file by clicking on Export.

You Tube

مشاهده ویدئو در یوتیوب

telegram

مشاهده ویدئو در تلگرام

instagram

مشاهده ویدئو در اینستاگرام

شروع به کار

بسته برنزی

آموزش تصویری نرم افزار جمینی نسخه فشن استادیو
تومان
335000
3 ماهه
  • شامل 79 ویدئو از فصل اول تا سوم
  • پشتیبانی از طریق چت آنلاین
  • بدون کتاب
پیشرفت

بسته نقره‌ای

آموزش تصویری نرم افزار جمینی نسخه فشن استادیو
تومان
695000
6 ماهه
  • شامل 153 ویدئو فصل اول تا ششم
  • پشتیبانی از طریق چت آنلاین
  • بدون کتاب
حرفه‌ای

بسته طلایی

آموزش تصویری نرم افزار جمینی نسخه فشن استادیو
تومان
1235000
12ماهه
  • شامل 212 ویدئو کتاب
  • پشتیبانی از طریق چت آنلاین
  • بدون کتاب
خرید کتاب

کتاب

کتاب نرم‌افزار الگوسازی جمینی نسخه فشن استادیو
تومان
850000
  • قطع رحلی 302 صفحه رنگی با کیفیت عالی
  • پشتیبانی از طریق چت آنلاین
  • بدون بسته آموزش تصویری
فیلدهای نمایش داده شده را انتخاب کنید. دیگران مخفی خواهند شد. برای تنظیم مجدد سفارش ، بکشید و رها کنید.
  • عکس
  • شناسه محصول
  • امتیاز
  • قیمت
  • در انبار
  • موجودی
  • افزودن به سبد خرید
  • توضیحات
  • محتوا
  • عرض
  • اندازه
  • تنظیمات بیشتر
  • ویژگی ها
  • ویژگی های سفارشی
  • زمینه های دلخواه
برای پنهان کردن نوار مقایسه ، بیرون را کلیک کنید
مقایسه
لیست علاقه مندی ها 0
توجه: شما مجاز به کپی محتوا یا مشاهده سورس نیستید!!