ویدئو شماره 40

Create component

 Directly from the interface, using the Create components button from General toolbar


The Create component function can be called from the General Toolbar. It is in the dropdown menu of the Style Editor button.
This function can be applied in steps.
In the first step, you can select the pieces to create a new component or to be added to an existing component.
The function accepts multiple selection.

When the selection is complete, you can click on the Next button or press Enter on the keyboard to move on to the next step.
In the second step, you can input the name of the new component or append the selected items to an already existing component.

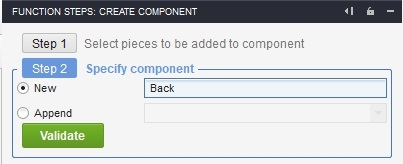
When the job is completed, you can confirm it by clicking on the Validate button or by pressing Enter on the keyboard.
A component created or updated with the Create component function is automatically added in the Component tab of the Style Editor window, next to the other components from the list. The selected pieces used for creating the component will become actions for the new component.

For each selected piece, the program will automatically generate two actions:

– one, for quantities;

– the other one, for properties.

The default values for both action types will be the same as their corresponding values from the interface, when the component was created.
Furthermore, every action can be changed in the Style Editor form, without affecting the piece properties in the main window.
Every component has 3 descriptors that can be edited in the Component Style Editor tab.
Two of them are optional and can be added:

– the description of the component, that can be filled with text;

– the preview of the component, that can be filled with an image.

The third descriptor is not optional, it is automatically filled with the preview of all geometries of the component’s pieces.
Any of the three descriptors can be hidden or displayed on demand.

  • Web preview

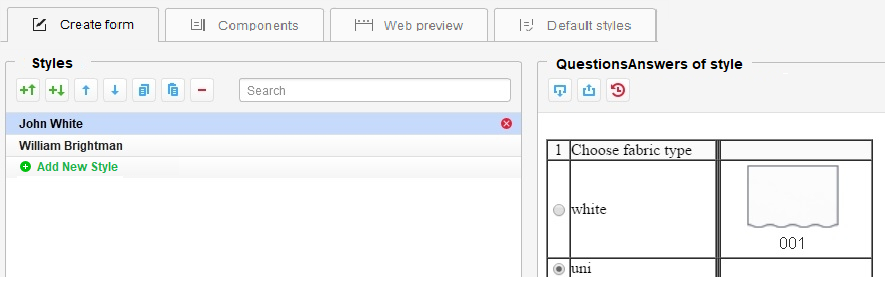
The Web preview tab of the Style Editor form is a window where you can verify the correctness of the logical conditions applied to questions and answers in the creation form.

In this tab, you can interact with the questions and answers in exactly the same way the end customer would interact with the website.
Once the Style Editor  is checked for correctness, you can generate in this form the HTML file that will further be posted on the website.
For every model change, or new option update, a new HTML file will be generated and the old one will be replaced on the website with the newly updated one, so the end customers can always benefit from the latest updates.

  • Create predefined style

The predefined style consists of a complete set of options for the current model.
The Default Styles tab from the Style Editor form is a window where you can create predefined sets of options for the most popular styles of the article.
This window can also be used to import already created styles of the same model. These styles can come from the website, and, in this case, they represent orders made online by the customers, or they can come from other collaborators that share the same model.
To create a predefined style, you must use one of the buttons from the Styles toolbar: Add New StyleAdd aboveAdd below.
The newly added style can receive a unique name.
This style can be locally populated with options by manually selecting the desired options or by loading an XML file, previously generated on the website or on a different station.
An XML file can be properly loaded into a model only if it contains the same questions and answers as the currently open model.
If there are differences between the questions and answers of the currently open model and the loaded XML file, then a warning message will be displayed and the XML file will not be loaded.

Such a predefined style can be further imported into the nesting software, to allow the cutting of the parts that together are the subject of an order.

 
You Tube

مشاهده ویدئو در یوتیوب

telegram

مشاهده ویدئو در تلگرام

instagram

مشاهده ویدئو در اینستاگرام

شروع به کار

بسته برنزی

آموزش تصویری نرم افزار جمینی نسخه فشن استادیو
تومان
335000
3 ماهه
  • شامل 79 ویدئو از فصل اول تا سوم
  • پشتیبانی از طریق چت آنلاین
  • بدون کتاب
پیشرفت

بسته نقره‌ای

آموزش تصویری نرم افزار جمینی نسخه فشن استادیو
تومان
695000
6 ماهه
  • شامل 153 ویدئو فصل اول تا ششم
  • پشتیبانی از طریق چت آنلاین
  • بدون کتاب
حرفه‌ای

بسته طلایی

آموزش تصویری نرم افزار جمینی نسخه فشن استادیو
تومان
1235000
12ماهه
  • شامل 212 ویدئو کتاب
  • پشتیبانی از طریق چت آنلاین
  • بدون کتاب
خرید کتاب

کتاب

کتاب نرم‌افزار الگوسازی جمینی نسخه فشن استادیو
تومان
850000
  • قطع رحلی 302 صفحه رنگی با کیفیت عالی
  • پشتیبانی از طریق چت آنلاین
  • بدون بسته آموزش تصویری
فیلدهای نمایش داده شده را انتخاب کنید. دیگران مخفی خواهند شد. برای تنظیم مجدد سفارش ، بکشید و رها کنید.
  • عکس
  • شناسه محصول
  • امتیاز
  • قیمت
  • در انبار
  • موجودی
  • افزودن به سبد خرید
  • توضیحات
  • محتوا
  • عرض
  • اندازه
  • تنظیمات بیشتر
  • ویژگی ها
  • ویژگی های سفارشی
  • زمینه های دلخواه
برای پنهان کردن نوار مقایسه ، بیرون را کلیک کنید
مقایسه
لیست علاقه مندی ها 0
توجه: شما مجاز به کپی محتوا یا مشاهده سورس نیستید!!