ویدئو شماره 189

MTM Parametric general specifications

Note!
This function requires an MTM Parametric license.
When clicking on MTM Parametric, on the lower side of the main window, an MTM Parametric-dedicated window is displayed, that is divided into three areas; in the Activity area, in Context options, is displayed the list with the geometric functions that will be applied.

The MTM Parametric-dedicated window areas are the following ones:

  • Geometric functions – the area where the script will be entered through the geometric functions.
    The script is structured as a table, with these columns:
  • No – the number of the geometric function from the script;
  • Show – checking/ unchecking this checkbox enables the showing/hiding, in the working space, of the geometric element creation mode.
    The selection of a function from the script triggers the marking of the created element and of the used parameters in the working space.
  • Geometric function – the name of the geometric function applied.

The following actions can be taken in this table:

 
Insert – clicking on this button allows you to enter a row without a geometric operation on top of the selected row. Here, a geometric function can be subsequently entered.
Delete – clicking on this button allows you to delete the selected row.

The colour of the geometric functions illustrates their state:

  • green – the geometric function contains all the parameters defined;
  • red – the geometric function contains undefined parameters;
  • black – row entered without a geometric function;
  • Geometric function description – the area where the function’s parameters are entered.

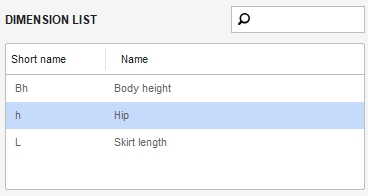
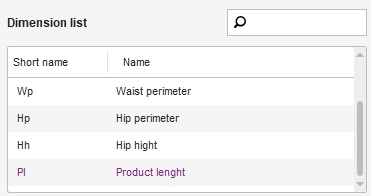
The dimensions from the list can be taken over in formulas by writing down the dimension shortcut or by a click on the dimension, in the list.

  •  Types of parameters used in geometric functions

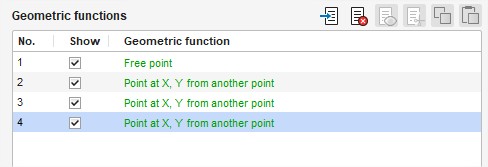
The elements of the geometric layer are created by entering the geometric functions from the Context options area into the script. Creating these elements involves entering different parameters into the functions.
The parameters that can be used are:

  • Geometric layer points – use this type of parameter in the functions where the reference points need to be declared to create another element;
  • Values – use this parameter to define constant distances or angles;
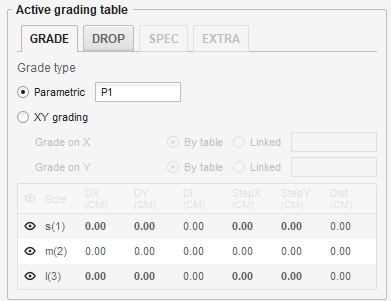
  • Ratios – this type of parameter is represented by the dimensions saved in the model through the Dimension table or the Measurement table, and is a variable value. These ratios can be entered in formulas either through a click on the name of the ratio from the Dimension list or through writing the shortcut in the formula’s field.
  • Distance between two points – use this parameter type to enter, in the formula, a distance defined by two points from the geometric layer. To enter this parameter type, apply one of these syntaxes:
    • dist(Pm,Pn) – the value of the direct distance between the Pm and Pn points;
    • distV(Pm,Pn) – the value of the distance in vertical direction between the Pm and Pn points;
    • distH(Pm,Pn) – the value of the distance in horizontal direction between the Pm and Pn points;
  • Angle between points – use this parameter to enter, in the formula, an angle’s value by defining three points from the geometric layer. To enter this parameter type, apply the following syntax:
    • ang(Pm,Pn,Px) – the angle defined by points Pm, Pn and Px, the tip of the angle being in point Pn.
      These parameters can be used in simple or complex formulas by using parentheses. The following syntaxes can be also used in formulas:
    • sin(Pm,Pn,Px) – calculating the sine of the angle defined by points Pm, Pn, Px;
    • cos(Pm,Pn,Px) – calculating the cosine of the angle defined by points Pm, Pn, Px;
    • tag(Pm,Pn,Px) – calculating the tangent of the angle defined by points Pm, Pn, Px;
    • ctag(Pm,Pn,Px) – calculating the cotangent of the angle defined by points Pm, Pn, Px;

MTM Parametric functions

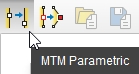
MTM Parametric general functionalities

  •  Anchoring a pattern to the geometric layer

To anchor a pattern to the geometric layer, you need to draw it, first, and, then, carry out its points’ snapping to the geometric layer points.
The pattern points anchoring to the geometric layer can be carried out by:

  • freely drawing the pattern and, then, operating the anchoring of the main points, in the Shape working mode, and of the technical elements (technical points, grain axis ends, technical line ends), in the Grading working mode;
  • drawing the pattern by snap to the geometric layer points.

Anchoring a pattern to the geometric layer in the Shape working mode or in the Grading working mode
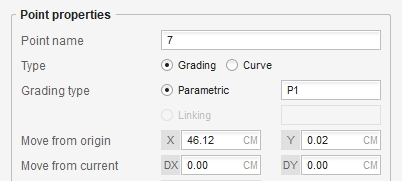
In the Shape working mode, the anchoring of the pattern’s main points to the geometric layer is carried out by entering, in Parametric from the Activity zone – Point properties, the name of the point from the geometric layer to which the anchoring is performed.

To anchor a main point to the geometric layer, you can also snap it to a point from the geometric layer while pressing Shift + S. After completing the snapping to a geometric point, in the Parametric field, is displayed the name of the point it was anchored to.
In the Grading working mode can be operated the anchoring of the main points, technical points, technical lines’ ends and grain axes’ ends to the geometric layer by entering, in Parametric from the Activity zone – Active grading table, the name of the point from the geometric layer to which the anchoring is done.

Anchoring a pattern to the geometric layer in the Draw working mode
In the Draw working mode, the contour points can be anchored to the geometric layer, during the drawing, by their being snapped to the geometric points while pressing Shift + S.
The anchoring to the geometric layer in the Draw working mode applies in the case of drawing pieces using the following functionsDraw free linesDraw free curves and Draw arcs.
The effects of anchoring main points to the points from the geometric layer are:

  • the main point’s coordinates on X and Y are calculated relative to the point it was anchored to;
  • the modification of the geometric layer points’ position will modify the position of the pattern’s points;
  • the anchored main points’ grading rules will be taken over from the geometric layer points; the grading table of main points can’t be edited.
  • Managing MTM Parametric sizes through Bespoke

The customer dimension information can be viewed by clicking on the customer’s name from the Bespoke panel.
The viewing of the customer dimension changes must be carried out in the MTM Parametric mode only.
Clicking on the customer’s name triggers the following:

  • changing the base size;
  • changing the geometric network and the points anchored to it, according to the client’s dimensions;
  • replacing the text from the artworks;
  • replacing the artworks;
  • viewing a style for the selected customer.
  •  Measurements as dimensions in MTM Parametric

Use this function only with the MTM Parametric working mode.
A measurement already existing in the measurement table can be used as a dimension in the MTM Parametric working mode.
To use a measurement as a dimension, the following requirement must be fulfilled: the measurement needs to have assigned a Short Name, which can be set from the Measurement table.

The measurements with the Short name set are added to the Dimension list from MTM Parametric, displayed in violet.


Note! When the shape of the piece is modified and this modification affects the measurements, the value of the measurement and the value used in the formula will be updated; as a result, the shape of the piece anchored at the geometrical point created with that dimension will be modified.

You Tube

مشاهده ویدئو در یوتیوب

telegram

مشاهده ویدئو در تلگرام

instagram

مشاهده ویدئو در اینستاگرام

شروع به کار

بسته برنزی

آموزش تصویری نرم افزار جمینی نسخه فشن استادیو
تومان
335000
3 ماهه
  • شامل 79 ویدئو از فصل اول تا سوم
  • پشتیبانی از طریق چت آنلاین
  • بدون کتاب
پیشرفت

بسته نقره‌ای

آموزش تصویری نرم افزار جمینی نسخه فشن استادیو
تومان
695000
6 ماهه
  • شامل 153 ویدئو فصل اول تا ششم
  • پشتیبانی از طریق چت آنلاین
  • بدون کتاب
حرفه‌ای

بسته طلایی

آموزش تصویری نرم افزار جمینی نسخه فشن استادیو
تومان
1235000
12ماهه
  • شامل 212 ویدئو کتاب
  • پشتیبانی از طریق چت آنلاین
  • بدون کتاب
خرید کتاب

کتاب

کتاب نرم‌افزار الگوسازی جمینی نسخه فشن استادیو
تومان
850000
  • قطع رحلی 302 صفحه رنگی با کیفیت عالی
  • پشتیبانی از طریق چت آنلاین
  • بدون بسته آموزش تصویری
فیلدهای نمایش داده شده را انتخاب کنید. دیگران مخفی خواهند شد. برای تنظیم مجدد سفارش ، بکشید و رها کنید.
  • عکس
  • شناسه محصول
  • امتیاز
  • قیمت
  • در انبار
  • موجودی
  • افزودن به سبد خرید
  • توضیحات
  • محتوا
  • عرض
  • اندازه
  • تنظیمات بیشتر
  • ویژگی ها
  • ویژگی های سفارشی
  • زمینه های دلخواه
برای پنهان کردن نوار مقایسه ، بیرون را کلیک کنید
مقایسه
لیست علاقه مندی ها 0
توجه: شما مجاز به کپی محتوا یا مشاهده سورس نیستید!!