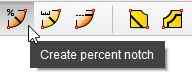
To create a notch at a certain percentage on a piece, select the Create percent notch function, from the Garment mode. After accessing this function, go to Step 1 – Select notch position on contour, and select the position desired on the contour. As soon as the position has been selected, on the contour is created a notch with the parameters’ default values. The reference points are defined by the two closest main points (one, considered clockwise relative to the notch, the other, anticlockwise relative to the notch), from the moment of the notch creation.
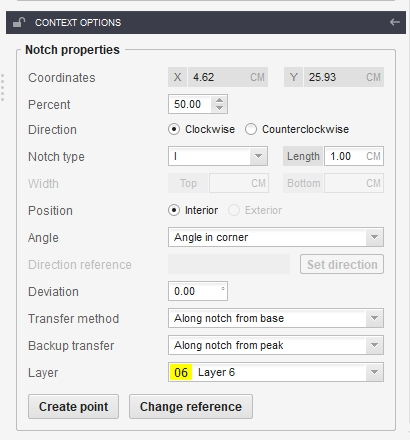
Once the notch has been created, in the Activity area/Context options, the Notch properties are displayed:
X and Y coordinates relative to the piece origin. These coordinates are not editable.
Percent – the percent where the notch is positioned relative to the reference points, a value that is editable.
Direction – the notch must be positioned clockwise or counterclockwise relative to the reference point.
Notch type – it can be I-shaped (interior), V-shaped (interior or exterior), U-shaped (interior or exterior), as well as T-shaped.
Notch length – editable value;
Notch width – for the V, U and T notches;
To set the notch’s positioning angle, select one of the following options:
Angle in corner– the peak of the notch must be placed on the point’s angle bisector where it is positioned.
Perpendicular to previous – the peak of the notch must be oriented so that the notch be perpendicular to the previous section.
Perpendicular to next – the peak of the notch must be oriented so that the notch be perpendicular to the next section.
Magnetic direction – you can magnetize the peak of the notch to one of the elements from the piece. The modification of the element’s position triggers the modification of the notch peak’s orientation.
Free – you can freely move the peak of the notch.
Deviation – the notch’s deviation angle;
Transfer method– the manner in which the notch is transferred from the seam line to the cut line (Along notch, from base; Along notch, from peak; Perpendicular to seam line; Perpendicular to cut line; Same point; Nearby point);
Backup transfer– the manner in which the notch is transferred from the seam line to the cut line if the transfer method initially chosen could not be applied (Along notch, from peak; Perpendicular to seam line; Perpendicular to cut line; Same point; Nearby point);
If you wish to cut the notch at the automatic cutting machine, you need to set it on a layer with order for cutting.
For a created notch, the following actions can be applied:
Create point – allows you to create a point at the base of the notch; it is automatically set as reference of the notch.
Change reference – for the selected notch, another reference can be selected.